Overview
This guide is designed to get you up and running quickly with digital disbursements by creating a one-time transfer to an end user via the Dwolla API. In this guide we’ll cover the basics of integrating the most lightweight payment flow, sending funds (also referred to as “payouts”), by outlining and walking through the necessary steps, to create a bank transfer. For simplicity, we’ll represent a one-to-one transfer between two users, where the source user is identified as the Master Dwolla account and the destination user is an individual or business that has been on-boarded via the Dwolla API. If your use case involves sending several digital disbursements in a single batch, it’s recommended that you leverage our Mass Payment API, which allows you to send up to 5,000 payments with a single API request.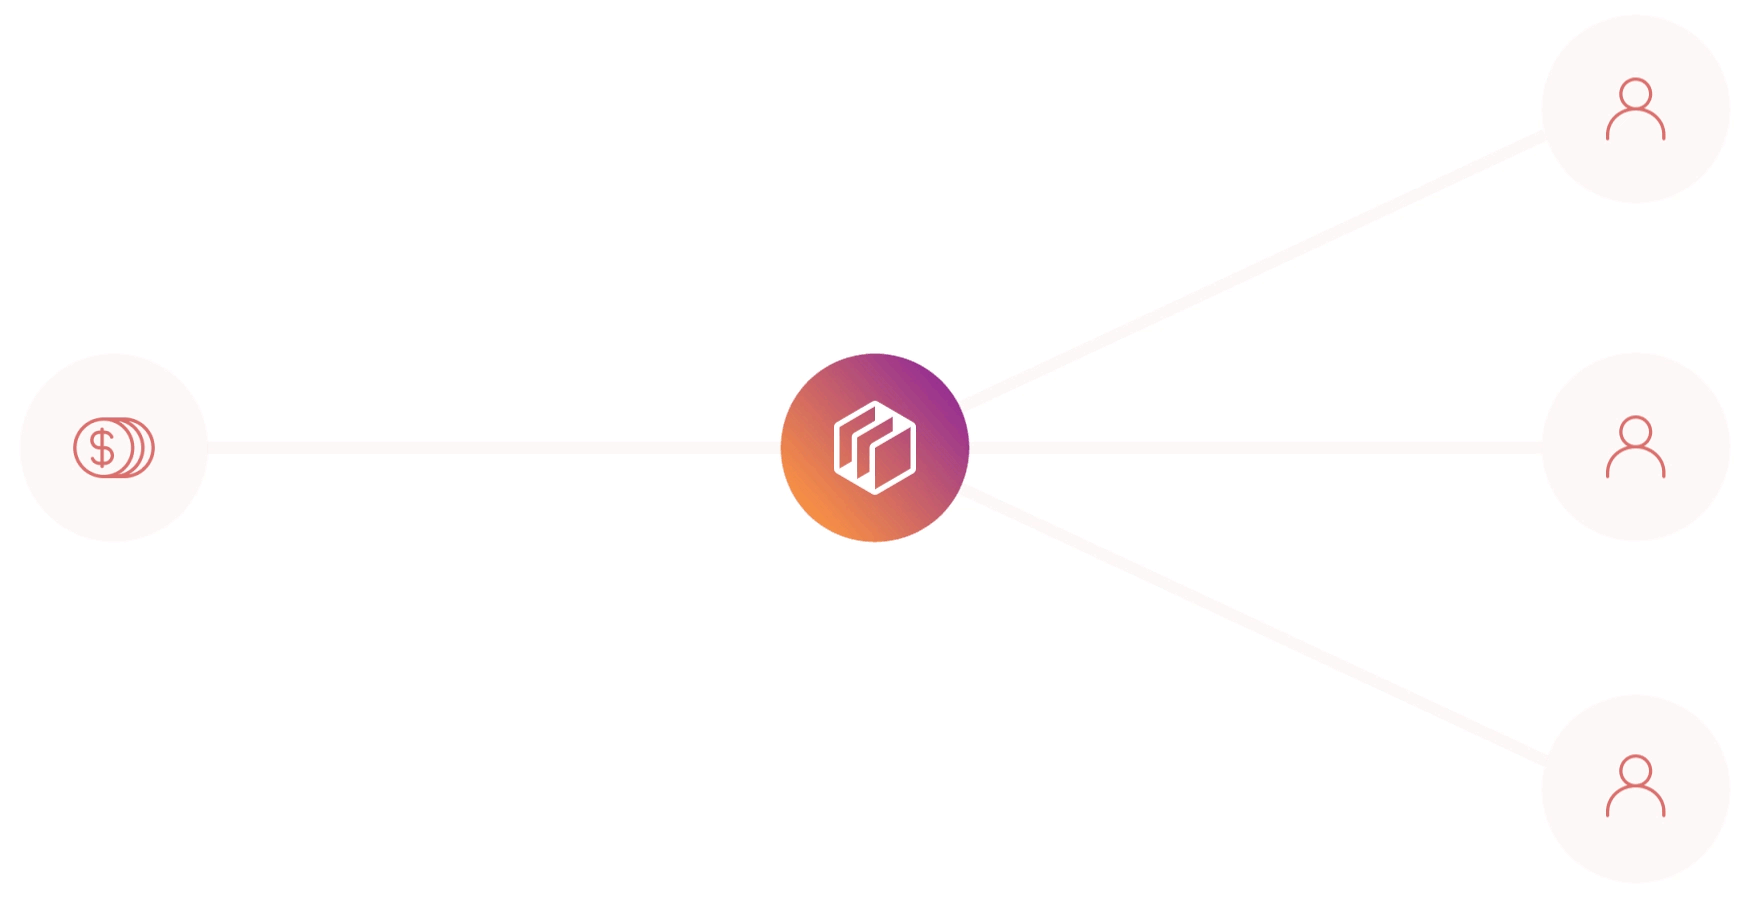
Key Concepts
In this quickstart guide, you’ll learn the key concepts involved with sending money to a recipient’s bank account via digital disbursements:Choose and create the Customer type for your recipient
Select the appropriate Customer type (receive-only, verified, etc.) and create a new Customer record through the Dwolla API to represent your recipient.
Attach a funding source
Add a bank account as a funding source to your recipient’s Customer record, which will serve as the destination for the funds transfer.
Retrieve available funding sources
Get a list of verified funding sources from both your Dwolla account and the recipient’s account to use as source and destination for the transfer.
Before You Begin
We encourage you to create a sandbox account, if you haven’t already. This will allow you to follow along with the steps outlined in this guide. Check out our Sandbox guide to learn more. After creating a sandbox account, you’ll obtain your API Key and Secret, which are used to obtain an OAuth access token. An access token is required in order to authenticate against the Dwolla API. Learn more about how to obtain an access token in our guide. Lastly, in this sandbox walkthrough, we recommend having an active webhook subscription. This will help notify your application of various events that occur within Dwolla. Check out our guide to learn more. Let’s get started!Step 1 - Create a recipient
Before your end user can receive funds to their connected bank account, they must be created as a Customer via the Dwolla API. The ability to send funds to end users is very flexible in that all Customer types can be used to leverage this funds flow. To learn more about the different types of Customers and the capabilities of each, check out our developer resource article.Create the Customer
While you can use any Customer type for this funds flow, we will be creating areceive-only user in this guide, as it offers a lightweight onboarding experience for users. Just as the name implies, receive-only users are only eligible to receive funds into their attached bank account.
Providing the IP address of the end user accessing your application as the
ipAddress parameter. This enhances fraud detection and tracking.Request Parameters - Receive-only User
| Parameter | Required? | Type | Description |
|---|---|---|---|
| firstName | yes | string | Customer’s first name |
| lastName | yes | string | Customer’s last name |
| yes | string | Customer’s email address | |
| type | yes | string | Value of receive-only |
| businessName | no | string | Customer’s registered business name (optional if not a business entity) |
| ipAddress | no | string | Customer’s IP address |
201 HTTP response with an empty response body. You can reference the Location header to retrieve a link that represents the created Customer resource. We recommend storing the full URL for future use, as it will be needed for actions such as attaching a bank or correlating that are triggered for the user in the Dwolla system.
Handle Webhooks
If you have an active webhook subscription, you will receive thecustomer_created webhook immediately after the resource has been created.
Step 2 - Adding a Funding Source
After creating our receive-only User, the next step is to attach a bank funding source. This will be the funding source where they will receive funds.Bank Addition and Verification methods
Within Dwolla, the sending party must always verify their bank account in order to be eligible to create a transfer. Although it’s recommended, the party that is receiving the funds does not need to undergo bank verification. There are three ways of adding a bank to a Customer with the Dwolla API. A simplified table below outlines the similarities and differences of each method.| Bank Addition Method | Will the bank be verified? | Required Information |
|---|---|---|
| API - Account & Routing Number | Optional - With Microdeposits | Bank Account and Routing Number |
| Dwolla + Open Banking | Yes | Online banking credentials |
| Drop-in components | Optional - With Microdeposits | Bank Account and Routing Number |
| Third Party - Plaid (Example) | Yes | Online Bank Credentials |
For more information on securely submitting a user’s bank details directly to
Dwolla from the client-side of your application, reference our Drop-in Components
.
Adding a Bank to the Receive-only User
In this step, we will be adding a bank account to our receive-only user by collecting their bank details within a form on our application. After initial validation of the form fields, the user’s bank details will be submitted to our back-end server where the API request is made to Dwolla to add a bank account.Request Parameters - Create a Funding Source
| Parameter | Required? | Type | Description |
|---|---|---|---|
| routingNumber | yes | string | The bank routing number |
| accountNumber | yes | string | The bank account number |
| bankAccountType | yes | string | Type of bank account: checking or savings |
| name | yes | string | Arbitrary nickname for the funding source. Must be 50 characters or less |
201 HTTP response with an empty response body. You can refer to the Location header to retrieve a link to the created funding source resource. We recommend storing the full URL for future use as it will be referenced when creating the transfer to this user’s bank account.
Handle Webhooks
If you have an active webhook subscription (required in production & optional in Sandbox), you will receive thecustomer_funding_source_created immediately after the resource has been created.
Step 3 - Retrieve funding sources
Now that you’ve created a Customer and associated its funding source, you are close to being able to initiate your first transfer. The transfer requires the following information:- The funding source to pull the funds from (a bank attached to your Dwolla Master Account)
- The funding source to push the funds to (a bank attached to your created Customer)
Retrieve your Dwolla Master Account’s list of available Funding Sources
Use the list an account’s funding sources endpoint to fetch a list of your own funding sources. You’ll need your account URL which can be retrieved by calling the Root of the API.Request and response
200 HTTP response with the details of each funding source. After retrieving your list of funding sources, we recommend storing the full URL for future use as it will be referenced when creating the transfer to your user’s bank account.
Retrieve your Customer’s list of available funding sources
Use the list an Customer’s funding sources endpoint to fetch a list of your own funding sources. You’ll need the Customer URL which can be retrieved from the API.Request and response
200 HTTP response with the details for the funding sources. After retrieving the funding sources, we recommend storing the full URL for future use as it will be referenced when creating the transfer to this user’s bank account.
Step 4 - Initiating a transfer
Now that our user is onboarded and their funding source has been created, we’re ready to create a transfer to their bank account. In order to create the transfer, we’ll need Funding Source links that represent both the source and destination bank accounts. Your customer’s funding source URL should be stored from the previous step and retrieved on demand when creating the transfer.Identify Source and Destination Parties
Since you are utilizing asend funds flow, you will need to ensure that you know exactly who will be receiving these funds.
- Source - Your Dwolla Master Account Bank Funding Source
- Destination - Your Customer’s Bank Funding Source
Initiate a Transfer
To initiate a transfer, we will need to specify the funding source URLs in the_links parameter.
| Parameter | Required? | Type | Description |
|---|---|---|---|
| _links | yes | object | A _links JSON object describing the desired source and destination of a transfer. |
| amount | yes | object | An amount JSON object. |
Request and response
201 HTTP response with an empty response body. You can refer to the Location header to retrieve a link to the created Transfer resource. All transactions that are sourced from a bank or that are going to a bank will have an initial status of pending. We recommend storing the full Transfer URL for future use, as it will be needed for correlating transfer update that are triggered for the user in the Dwolla system.
Handle Webhooks
A single API call to create a payment transfer can trigger several transfer-related webhook events. The number of webhooks and type of webhook events can vary depending on the Customer type(s) involved in the transfer, as well as the source and destination for the funds transfer. For more information on which webhooks will be fired, refer to our API Reference Docs.Simulate ACH Processing
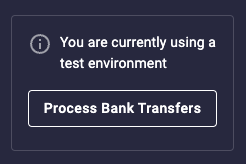
To simulate ACH processing in the Dwolla environment, navigate to the Sandbox Dashboard. From here, you will want to click the “Process Bank Transfers” button on the top of the screen. Your Sandbox transfer will be moved out of apending status and moved to a processed status.
Verify Status of Transfer
Since ACH transactions can take a few days to complete, webhooks are an efficient way to notify you of when a transfer is completed andprocessed to a destination funding source. However, if you want to verify the status of a transfer at any given point in time, you can make a call to the API to retrieve the transfer by its unique id.